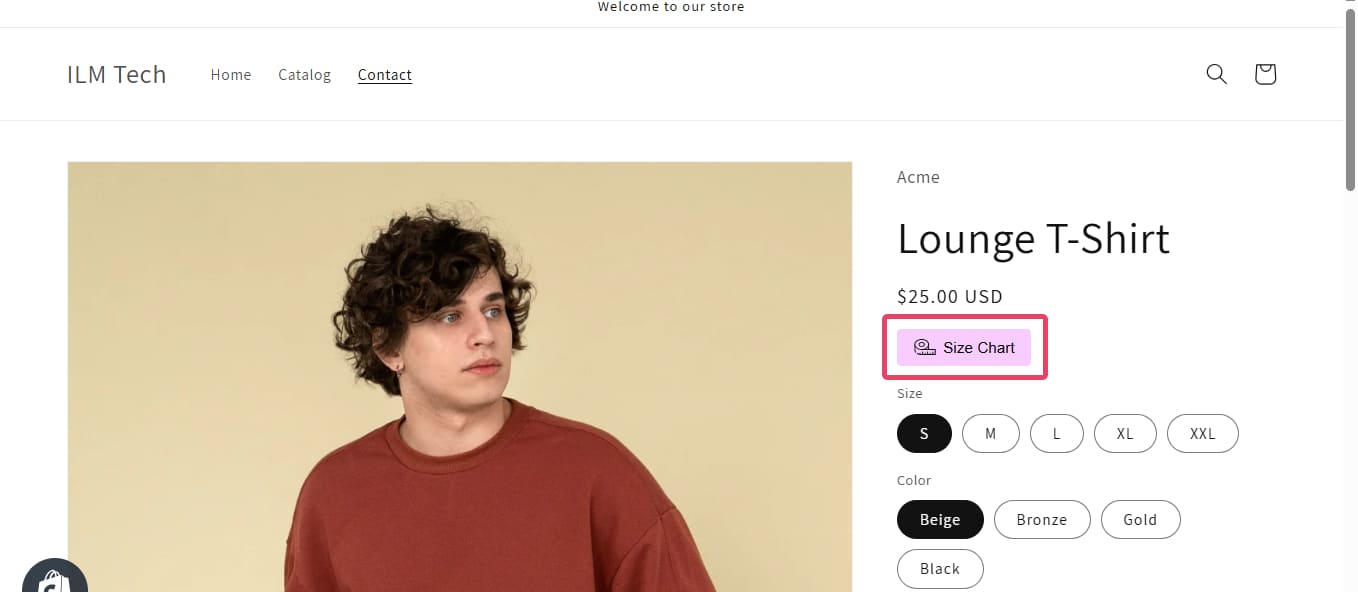
Step 1
This article will guide you on how to select the size chart position on your product page using the Smart Selector feature. With this tool, you can visually and directly choose the size chart position on your live site. Let's begin!
To use Smart Selector, first you need to enable the advanced position and click on the mouse icon at Position:

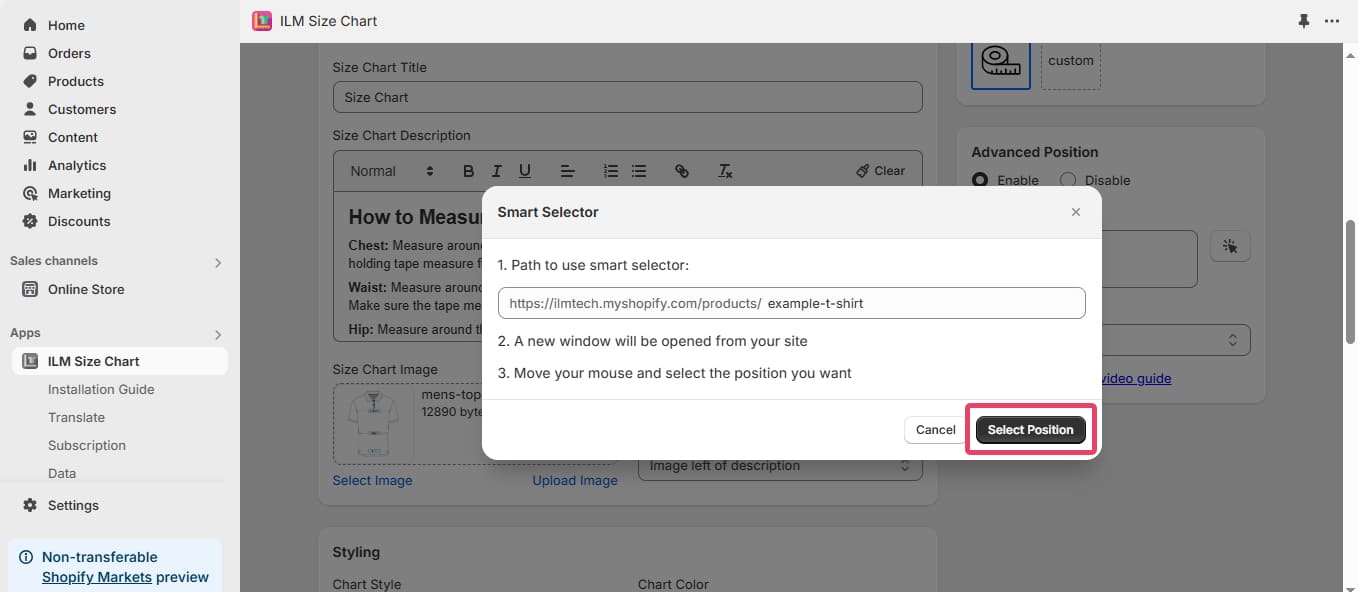
Step 2
After clicking the mouse icon, the Smart Selector popup will appear. Here, you can either use the default URL or enter the URL of the page where you'd like to set the size chart position. The position you select on this page will be applied to all other product pages.
Click "Select Position" to open the page and choose where to display the size chart button.
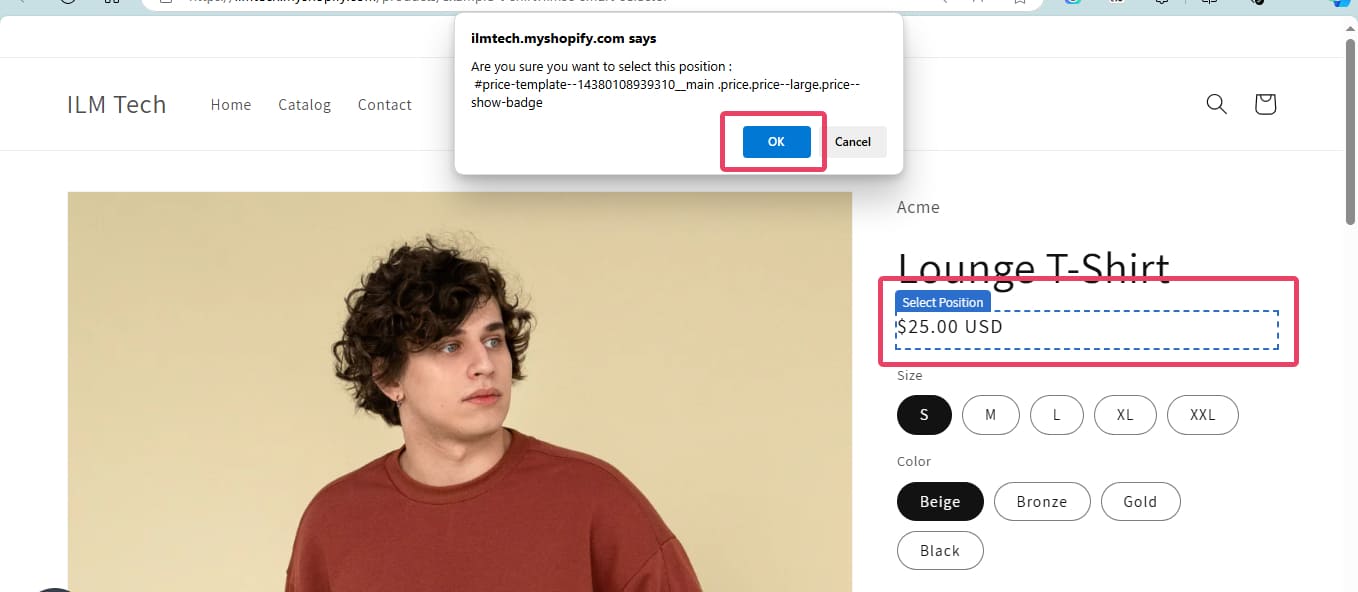
Step 3
Hover over any position you want to display the Size chart button. There will show select position text, you just click on it will appear confirmation popup, click Ok and you have finished choosing the size chart display position on your product page.
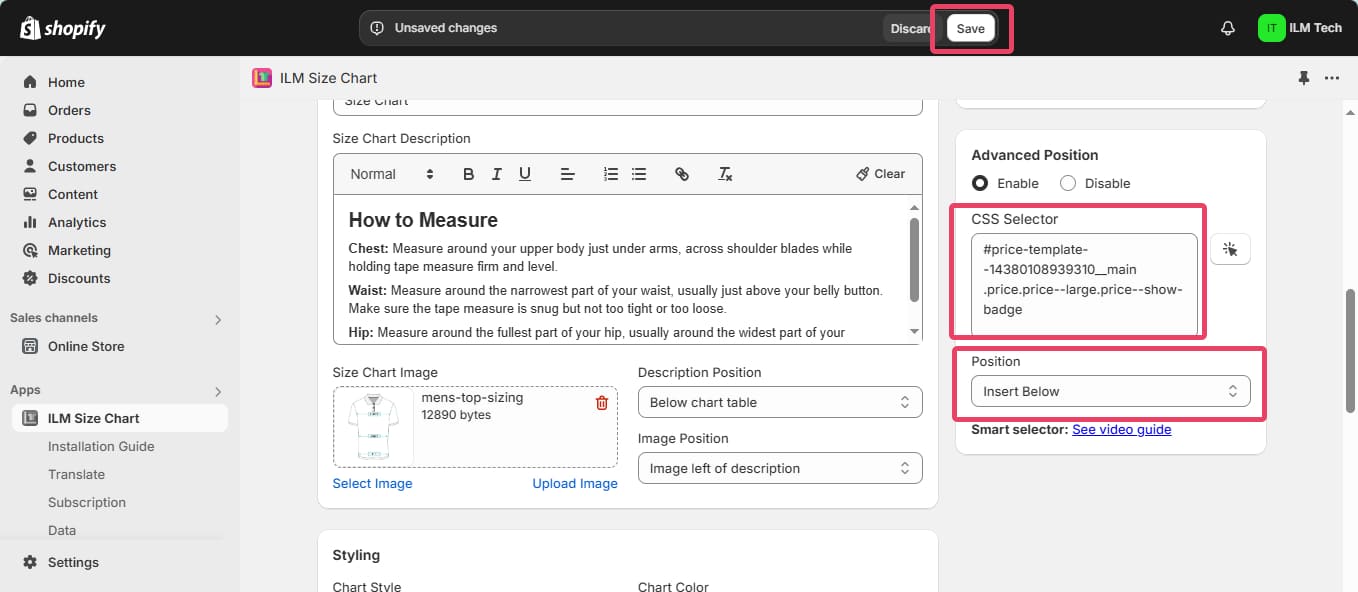
Step 4
CSS Selector: The CSS class for the selected position on your product page will be displayed here.
Position: You can place the size chart button either above or below the selected position.
Once you've completed your settings, be sure to click "Save".
Check your storefront. You have successfully configured the size chart position.